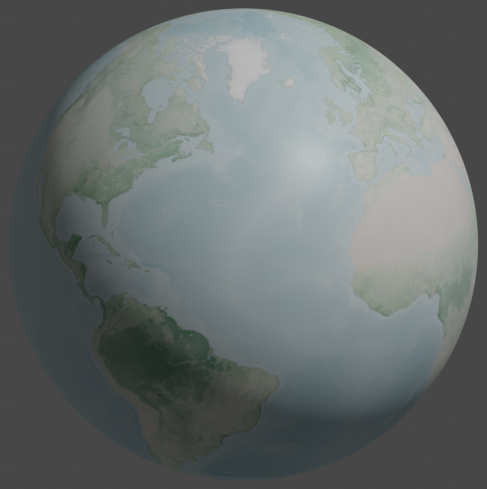
In a previous post, Using Environment Textures in Blender 2.91, I used an environment texture to render a virtual globe:
Then, in a follow-up post, Baking Environment Textures in Blender 2.91, I showed how to bake the environment texture onto a UV image. This is useful for example when exporting the globe to a game engine like Godot, which can work with UV maps but not with environment textures.
Here we will try to find a good way to present the globe in an interactive game using the Godot game engine. For starters, let’s quickly recreate the globe in Blender from the previous posts. I’m going to use Blender 2.93.5 this time.
NOTE: This post builds on the previous two to some degree. When in trouble, follow along the previous tutorials.
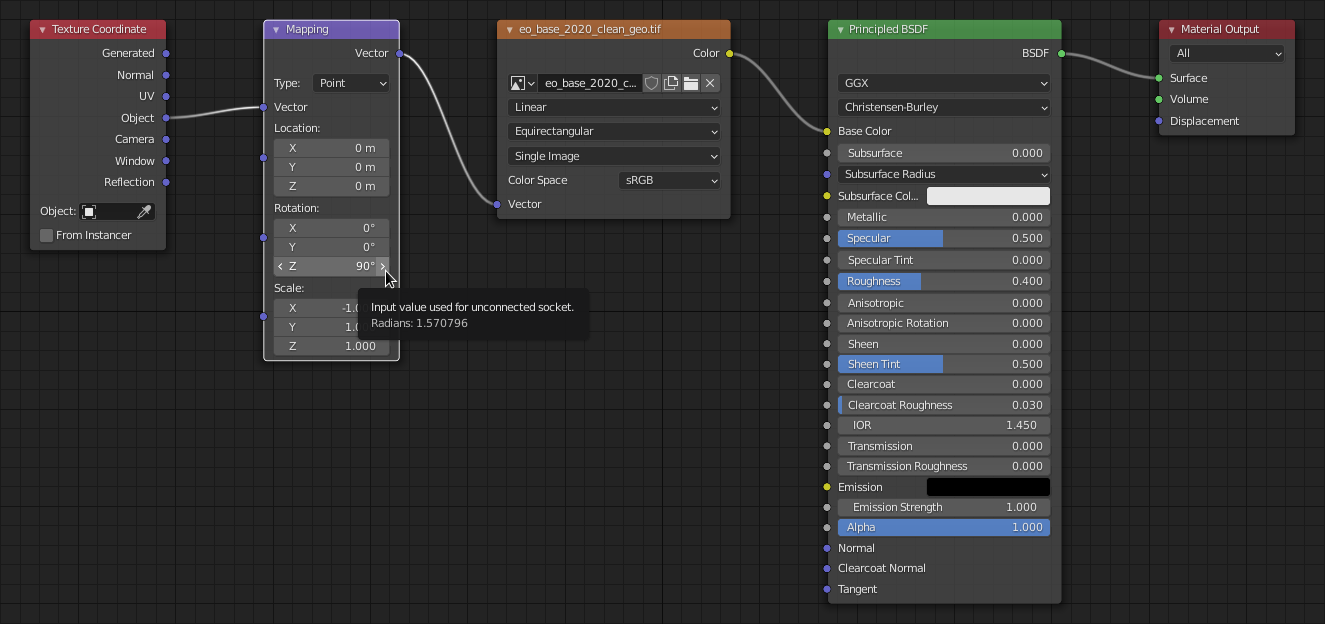
When setting up the texture coordinates for the material, make a small tweak: rotate the texture by 90° along the Z axes. This will make the 0° longitude appear in the centre when viewing the object from the front.
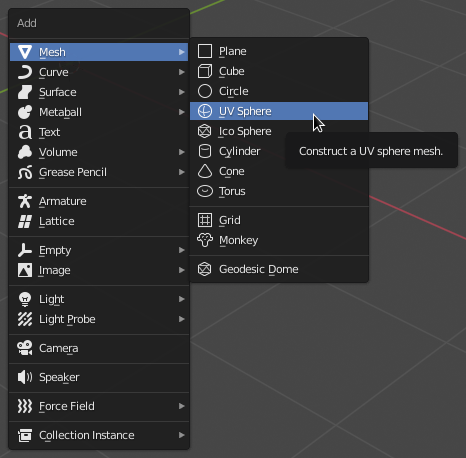
When done, obliterate the cube, camera and light (A, X, Enter) and add a UV sphere (Shift+A, M, U).
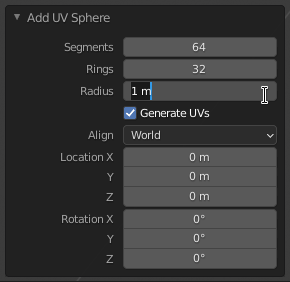
Add a few more segments and rings to make the edges look less jagged, but keep the radius at 1m for now (more about that value later).
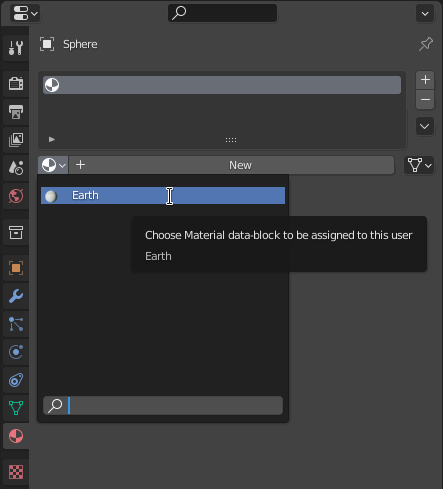
Change the material to Earth (i.e. the name given to the material in the previous posts).
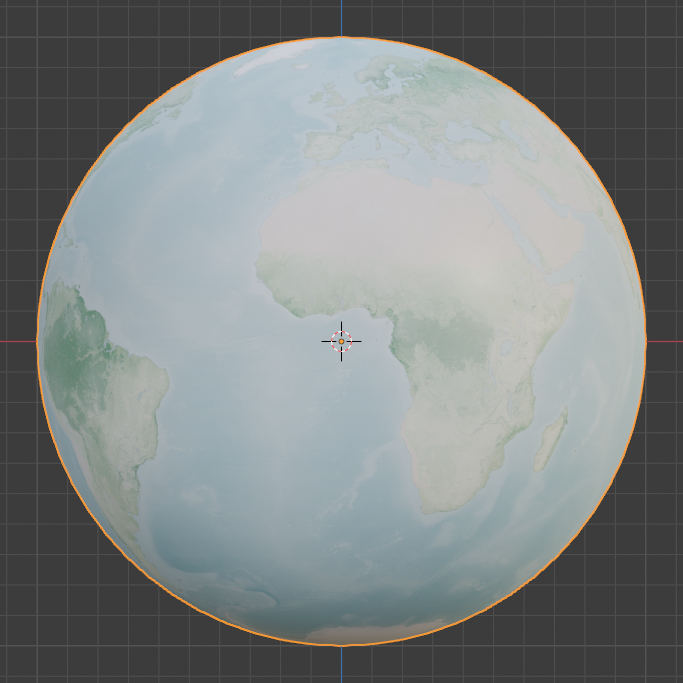
Now right-click (or select Object from the menu) and select Shade Smooth. Clicking View » Viewpoint » Front (Numpad 1) should make Africa and Europe visible in orthographic view:
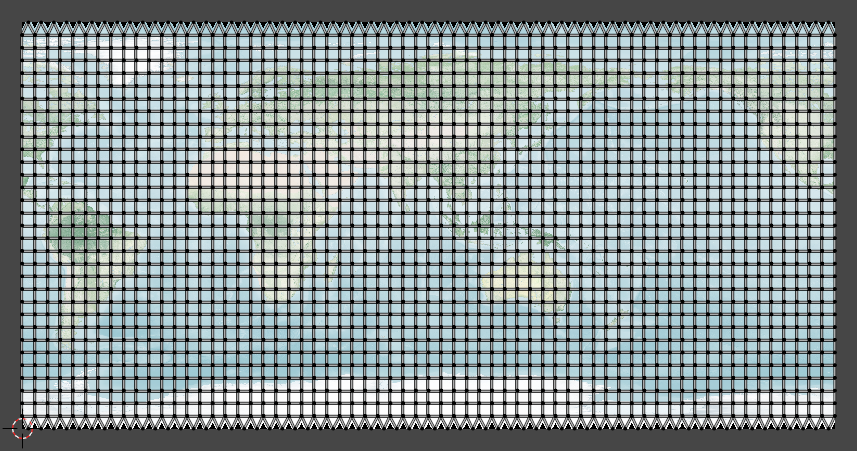
Good! Now use the default UV unwrap to bake the texture onto an image. Use a 2:1 aspect ratio for the sphere, 4096px × 2048px will be more than enough for this exercise.
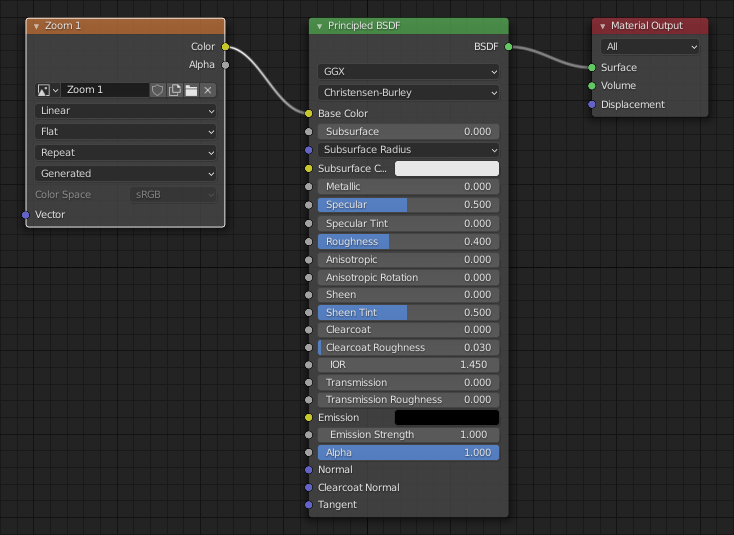
When done baking, one important thing to remember is to change the material to use the newly baked image texture instead of the environment texture. Simply connect the newly added image texture node instead of the environment texture node (which can now be removed):
Welcome to Godot
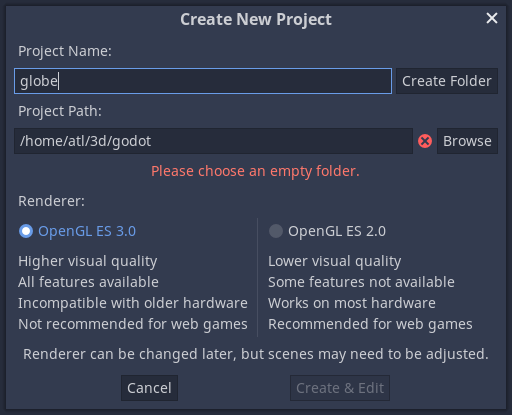
The next step is to create a simple geme in Godot and import the globe from Blender. Fire up Godot (I’m using version 3.4) and create a new project. No need to use a template, we really just want an empty project.
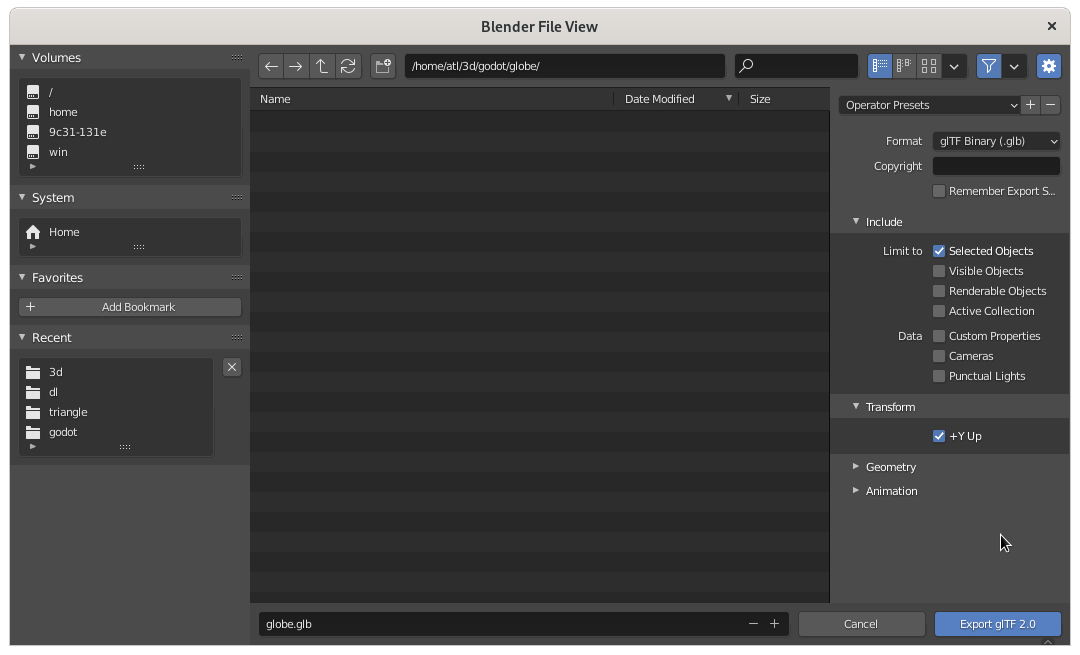
Now that the project directory is created, we can export our scene from Blender. Select File » Export » glTF 2.0 (glb/gltf). Save the file in the newly created Godot project directory, or in a subdirectory if you’re feeling fancy.
If you have other objects in Blender, then make sure to select the UV sphere and check Selected Objects under Include » Limit To when exporting.
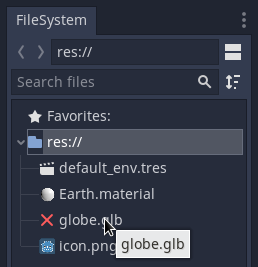
Back in Godot, notice that the globe.glb file has appeard under res://:
Setting up a 3D scene
Now, normally, you could simply drag and drop it to the main view. But we haven’t set up a root node yet, so there’s nowhere for the scene to go. To fix that, click the 3D Scene button under Create Root Node: in the Scene tab:
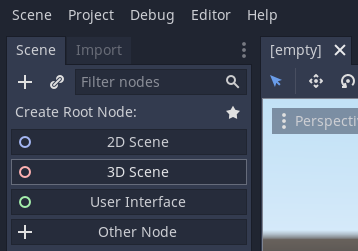
This will create a root node of type
Spatial,
which is the type of node you’d want to use in 3D games. You can also
double-click (F2) to rename your root node; I called mine “Universe”, since
it will have Earth right in its centre ;)
Anyway, now dragging the globe.glb resource to the viewport should create an
instance of the scene, along with all the meshes we exported from Blender — in
our case, just the one UV sphere. The scene will likely be created in a rather
inconvenint location, so let’s move it to the world origin. To do that, select
the newly added scene in the node tree (initially called “globe”, after the
name of the resource), and notice how all of its properties become visible
under the Inspector tab on the right. Expand the
Transform property
and reset the coordinates of its translation vector to zero.
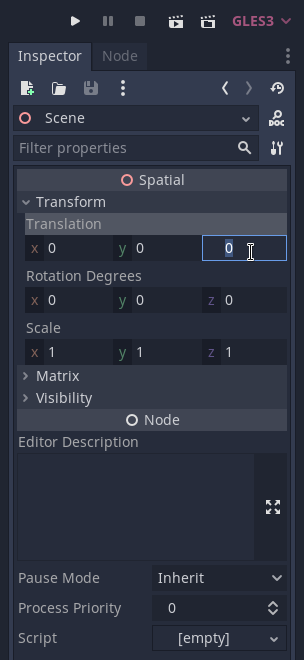
(If it doesn’t seem to work, make sure the scene object is selected in the node tree, not the root node.)
Now that we have our globe in the game, let’s add a camera so that we can actually see it. Note that it is also possible to add the camera in Blender and export it as part of the scene. We didn’t do that here because we want to configure the camera parameters right in the game engine.
When adding the camera, it is best to add it to the scene we’re working with. We could add it to our “Universe” node too, but let’s add it to the imported scene instead — this way if we move around our scene, the camera will follow the globe.
To add the camera to the imported scene, first we need to make its children editable by right-clicking on the imported spatial node and ticking the Editable Children checkbox. (Note that the name of the node was “globe” originally; I renamed it to “Scene” in this example.)
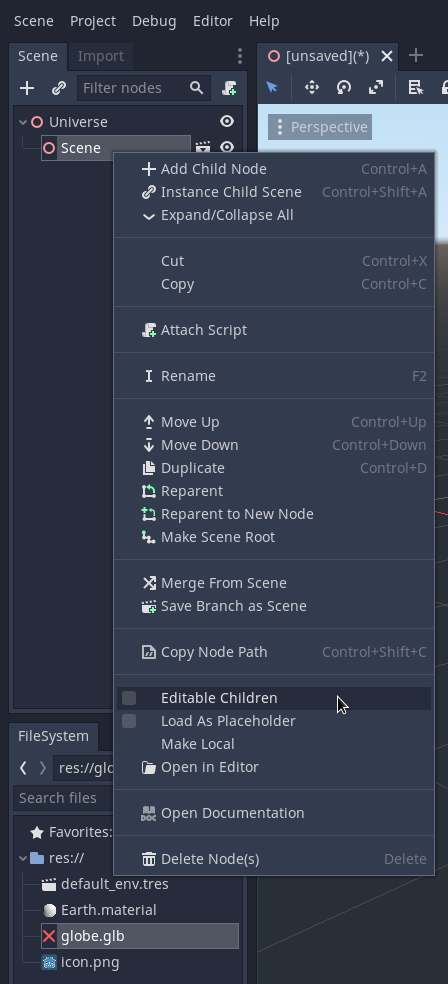
Now the easiest way to add a camera is by right-clicking the scene object in the node tree and pressing Add Child Node (Ctrl+A), then search for “camera” and click Create. A camera will be added to the world origin, which is unfortunately inside of our UV sphere.
To move it out, you can use the same method as earlier when moving the UV sphere, or by simply dragging the blue arrow to pull it along the Z axis. Hold down Ctrl to snap to the grid.
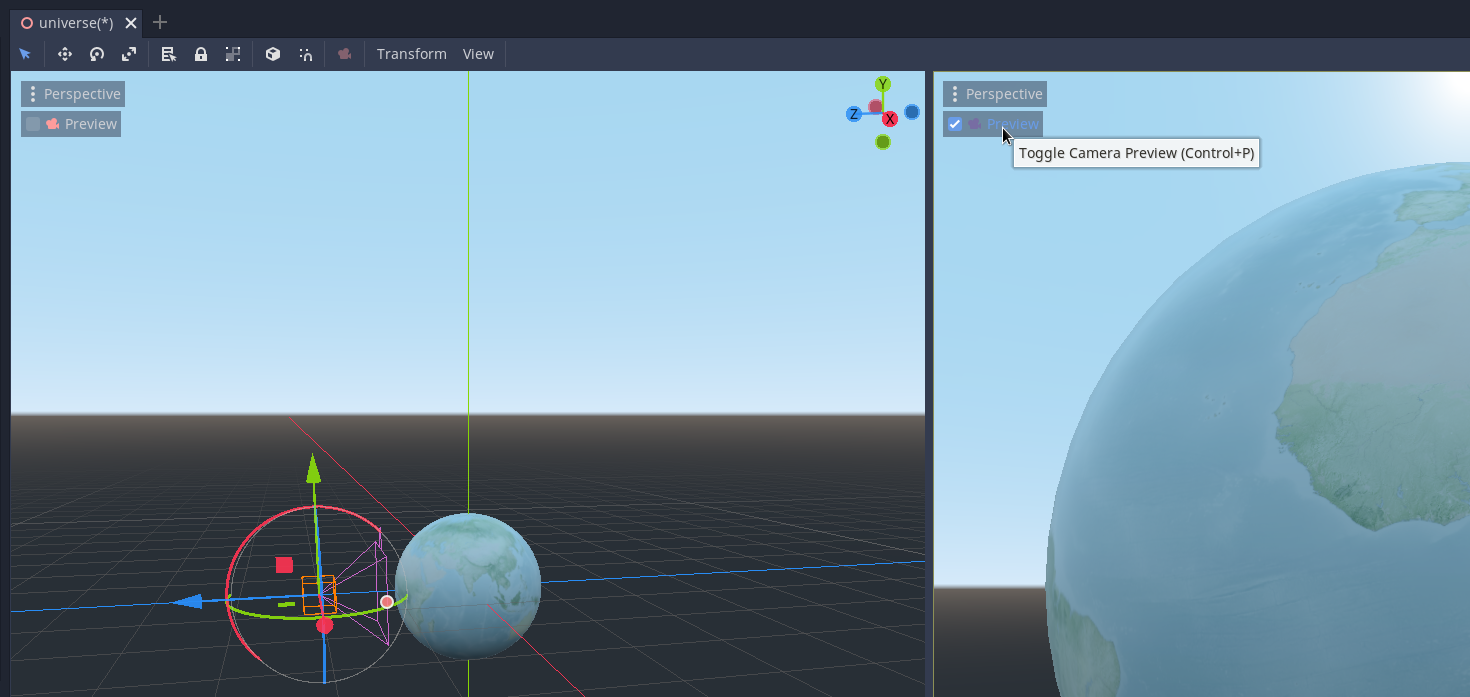
Moving the camera back by 2 units should be good enough, but wouldn’t it be even better if we could see what the camera sees? One easy way to do that is by selecting the 2 Viewports or 2 Viewports (Alt) under the View menu, then, while having the camera object selected in the node tree, click the Preview checkbox in one of the views. Now as you move back the camera, you can see roughly what it will look like when playing the game.
With the camerae in place, now we can finally play the game! Click the play icon in the top-right corner, or press F5 to start the game in debug mode.

TADA! We can… well, we can observe the globe. This game isn’t very interactive yet, but in the next tutorial we’ll see how to add a simple short script to make the globe interact with the mouse. We’ll also discuss camera properties like aspect locking, focal length and field of view in detail, and see how other engines like Google Maps use different camera settings for a nice and smooth transition effect.
Next step in the series: